Shaded Woods (2)
Thank you for printing this page from www.SuperCheats.com.
Remember to come back to check for updates to this guide and much more content for Dark Souls II
Follow this guide to hear about updates
Last Updated:
Shaded Ruins
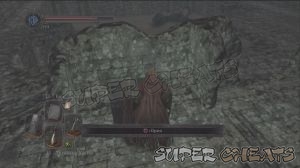
Continue up the ramp and you'll find the area's bonfire. Continue up the ramp and get the Radiant Lifegem from the corpse.

Drop down to the floor below and go down the ramp to the right, near some rubble. You'll find a chest in the room below containing Magic Bolt x10. Go back up and sprint-jump to the right to land on the ledge. Go to the left and loot the corpse to get Soul of a Brave Warrior and Firebomb x3.


Continue along the ledge and use Fragrant Branch of Yore to unpetrify the enemy. Defeat it to get a Fang Key. Cross the fallen trunk to return to the bonfire.

Go up the ramp beside the bonfire to reach the upper floor. From there, you can peek over the ledge to find a broken bridge below. You can do a running leap over the ledge to land on the bridge. From there, you can enter the ruins of the building to find a frog inside. Kill it and loot the Soul of a Brave Warrior, Twilight Herb from the corpse inside. Jump across the gap of the bridge to find a Black Knight Halberd from the chest. You'll need to use a Homeward Bone to return to the bonfire.

From the bonfire, continue along the path until you reach the ramp leading outside. The urns scattered around the area can curse you but breaking them will stop their effects. Outside, you'll find a huge toxic toad. There are also beast warriors around the area. These enemies here hit really hard and have impressive defense so you may want to do hit and evade since facing them head-on won't be a good idea.
Lure the beast warriors first and deal with them one by one, preferably inside the ruins. Once theyr'e taken care of, you can now fight the toad. If you're a ranged character, you just need to get close enough to get a lock-on then snipe it from a distance. The amphibian won't seem to react or chase you anyway. Just be prepared to run back to the ruins in case it chases after you. Melee characters should wait until the enemy attacks. Be watchful of the nearby beast warriors as well to avoid getting surrounded. Loot the Petrified Dragon Bone the toad drops.

Go uphill and enter the other side of the ruins where you came from, where the toad is initially facing. Destroy the curse urn then jump across the gap to reach the chest containing a Titanite Chunk and Petrified Dragon Bone. Exit then turn to the left to find another chest behind some destroyed wall and surrounded by curse and poison urns. Loot Human Effigy x3 and Bleeding Serum x3 from it.


Now turn around and find the corpse by the wall past the building to the right. Loot it to get a Flame Butterfly and Torch x3. Enter the building and go downstairs. Loot the corpse behind the giant barrels to get a Soul of a Brave Warrior and Pharros' Lockstone.

If you head outside, you'll find a large scorpion man. He is not hostile but to talk to him, you should have the Ring of Whispers. You can buy one from Shalquoir, the cat merchant in Majula. Before going there, destroy the curse urn nearby and loot the chest to get a Dark Scythe.
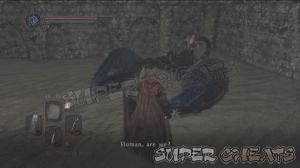
Manscorpion Tark
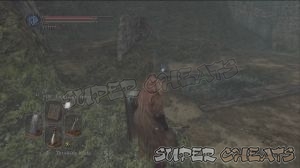
If you have a Ring of Whispers, you can talk to Tark. After learning his request, find the path going downstairs and kill the beast-warrior there. Loot the corpse to get a Torch. If you head outside, you'll find a petrified beast warrior. You don't need to waste a Fragrant Branch of Yore on him; you can reach the area behind him by leaping over the bridge, from the floor above the bonfire. Now take the stairs and enter the ruins of the building to find a frog inside. Kill it and loot the Soul of a Brave Warrior, Twilight Herb from the corpse inside. Jump across the gap of the bridge to find a Black Knight Halberd from the chest.


Return to where you defeated the giant frog and go to the ledge in the second floor of the ruined buildings to loot a corpse containing a Pharros' Lockstone and Soul of a Brave Warrior. Approach the next enemy in the open space. Be careful of the ground where the curse urn is in the middle; it is a fake ground that will crash down if something steps on it. After defeating the beast-warrior, loot the corpse nearby to get a Lifegem.

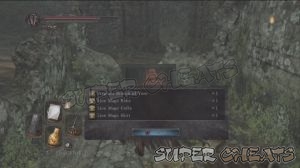
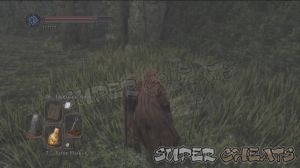
There's another petrified lion warrior that blocks the path towards a chest. This chest contains a Lion Mage armor set and another Fragrant Branch of Yore so might as well loot it, especially if you're a caster since the set improves spells' casting speed.

The tower ruins nearby have treasures as well. Take the stairs in the ruins to the right and you'll find a corpse hanging from a broken staircase after the barrels. Loot it to get Soul of a Brave Warrior and Skeptic's Spice. From there, if you continue uphill, you'll find the large misty doorway leading to the boss area. Don't go there for now.

Explore the ground near the ledge in front of the ruins until you find a fake ground that will make you fall to the ground below. Here you'll find a chest containing a Homing Soulmass and an NPC in a wheelchair. He is called Darkdiver Grandahl. He will allow you to join the Pilgrims of the Dark covenant after meeting the necessary requirements.

After that, drop down below. Be careful of the corrosive liquid as it will degenerate your equipment and accessories quickly enough to destroy them. You can unequip them and fight the enemies with your weapon and shield only. Continue forth and be careful when approaching the iron door; there are several toads inside that will attack you all at the same time if you're not careful.

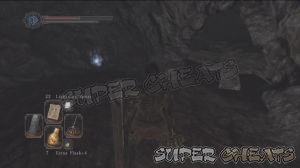
Enter the hole to the left to find a corpse. Get a Twinkling Titanite from it. The door ahead requires the Fang Key which you can get by unpretrifying the lone enemy beside the fallen trunk leading to the area's bonfire. After opening the Fang Key, talk to Ornifex and she'll be able to trade your Boss Souls to powerful weapons. She'll relocated in Brighstone Cove Tseldora after freeing her. Loot the corpse nearby as well to get an Estus Flask Shard.

Now backtrack to the bonfire and it's time to face the boss of this area.
Boss: Scorpioness Najka
When you enter the battlefield, you'll find a half-buried woman that will attack you with powerful magic. Damage her and she'll reveal her whole body. At close range, she'll attack you with her two venomous tails, her pincers or her spear. These are slow attacks that you can easily anticipate and evade. She's open after attacking with her tails so use this chance to damage her.
When she distances herself from you, anticipate that she's going to use a fast, homing soul spear. Wait until the projectiles arches towards you before you roll to the side to successfully evade them. Once below half of her HP, she will then burrow on the ground. Look closely at the moving dust on the ground, indicating her position and direction. You can't attack her during this move and you have to evade just in time when she unborrows under you.
When critically injured, she'll conjure five orbs over her. These orbs will fire delayed soul arrows which makes it hard to evade. Hopefully, the other arrows fire when you're still recovering from being knocked down or when you're behind cover. From hereon, she'll be more aggressive with her attacks, usually doing 2-3 hit combos with her weapons and limbs. Fight defensively and attack only after she finishes her combo to achieve victory.

The Scorpion Queen
The door behind the boss leads to the Doors of Pharros. For you convenience, find and activate the bonfire in the area first. It is located straight ahead, under the hole. Just kill the two enemies here to reach it safely. For now, head back to Tark and talk to him to get a Fragrant Branch of Yore. Talk to him again to learn the Warmup gesture.

Anything missing from this guide?
ASK A QUESTION for Dark Souls II
Comments for Shaded Woods (2)
Add a comment
Please log in above or sign up for free to post commentsNo comments yet. Tell us what you think to be the first.
Table of ContentsClose
Guide Updates
Get notified of updates to this guide
Many of our guides get updated with additional information. To get an email when this guide is updated click below.
 Join us on Discord
Click to close